
Steps to submit your retrospective employer return
We may ask you to complete a retrospective return if you were a liable employer in the community services industry during quarters before you registered with QLeave. This is to ensure your employer returns are completed for the period/s prior to your registration.
Log in
1. Click here to go to the employer portal.
2. If you're logging in to the portal for the first time, you will need to reset your password.
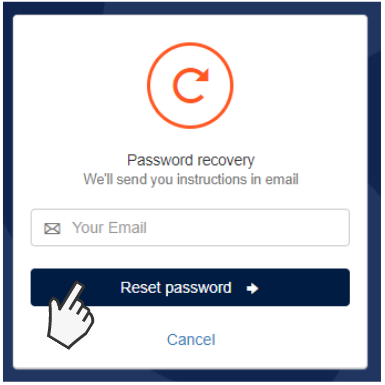
Select Forgot password? and then click the Reset password button on the next screen to receive an email with a password update link. Follow the prompts in the email to reset your password.
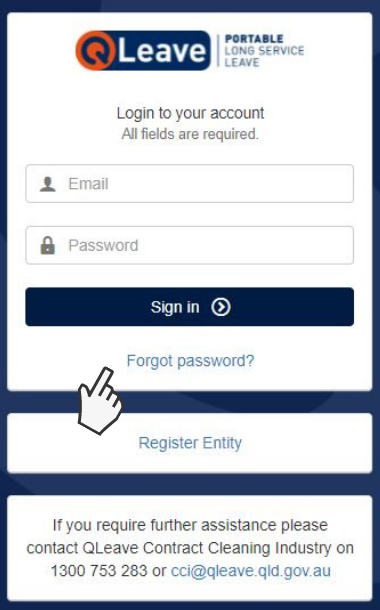
Please note: If you'd like another contact within your business to have access to the portal so they can complete returns, you will need to enable their portal access. Click here for instructions.
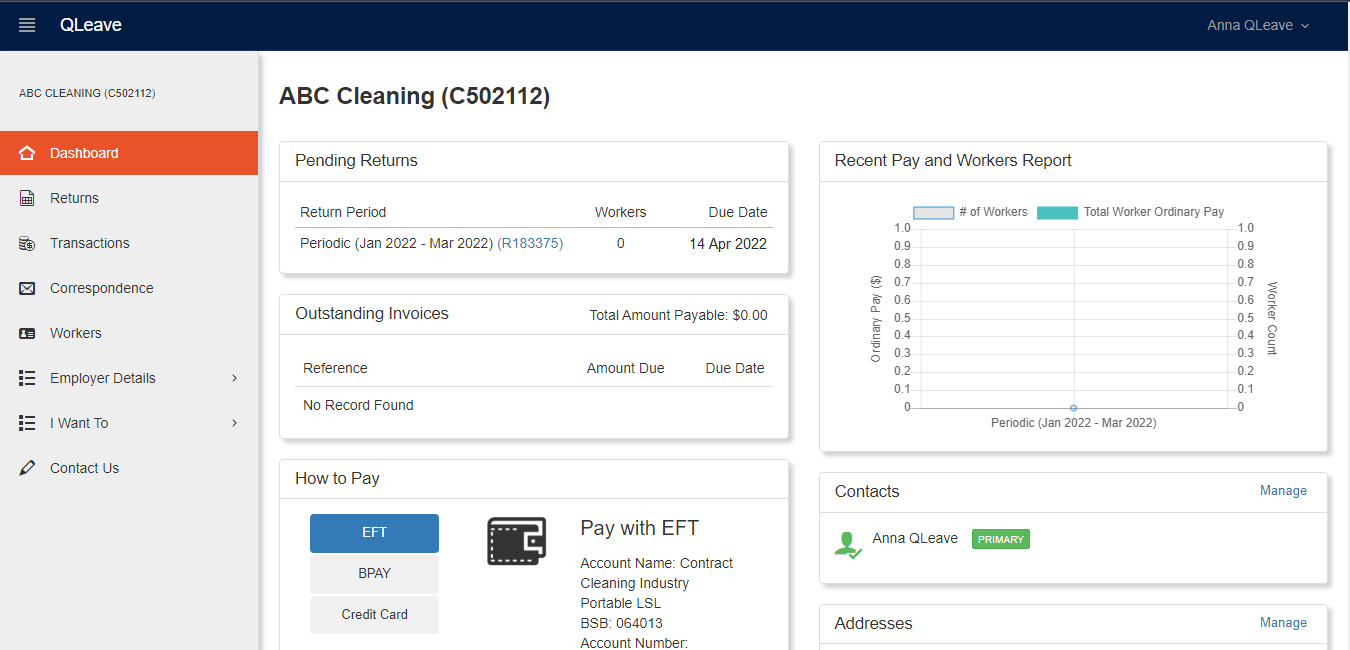
3. Once you’ve logged in to the portal with your new password, you will see your Dashboard on the screen. The dashboard gives you a snapshot of your registration information and tasks including pending returns, outstanding invoices, reports and contact details.
Start your return and add or terminate workers
START YOUR RETURN
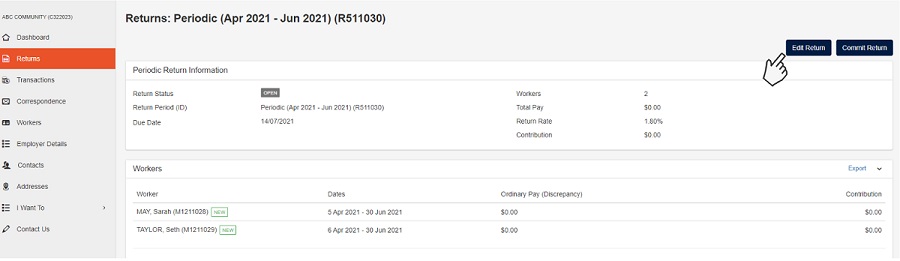
1. Click the Returns tab on the left hand menu.
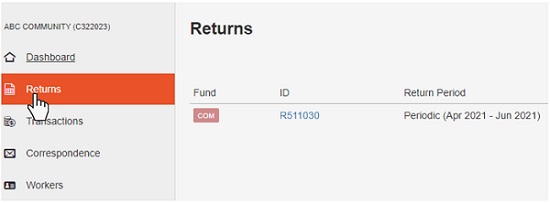
2. Click the blue Return number (e.g. R110080). New returns will have a return status of Open.

3. Click Edit Return on the top right of your screen to start your return.
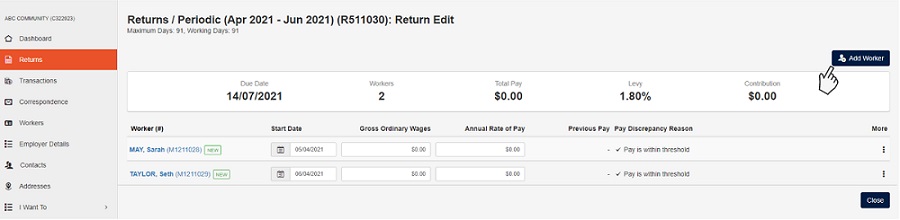
Add Workers
If this is your first return, or you've had new workers start with you this quarter, you will need to add workers to the return before entering data.
Please note, you only need to record service for workers who worked five or more days in the quarter. Any workers who worked less than five days do not need to be included on your return.
1. Click Add Worker
2. Select the option that meets your requirements: Registered Worker, Returning Worker or New Worker and click continue.
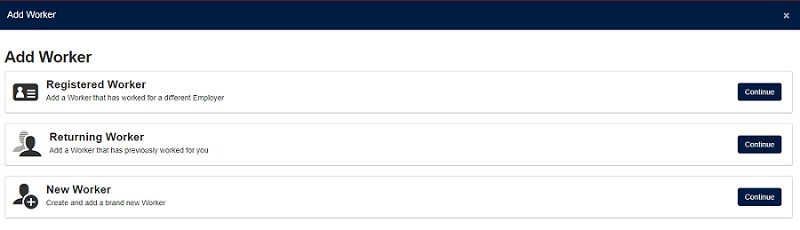
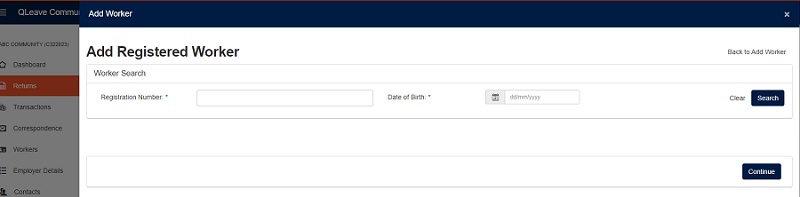
- Add Registered Worker - you can add a worker who is already registered with QLeave. You will need their QLeave worker number and their personal details.
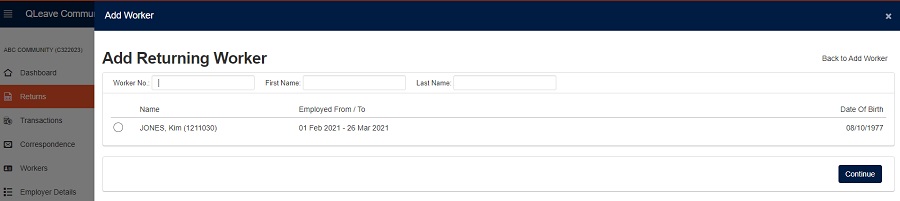
- Add Returning Worker - you can add a returning worker you have previously employed. Select returning worker from the list or you can search for them by their worker number or name.
- Add New Worker - use this option to add a brand new worker, who doesn't have an existing QLeave registration.
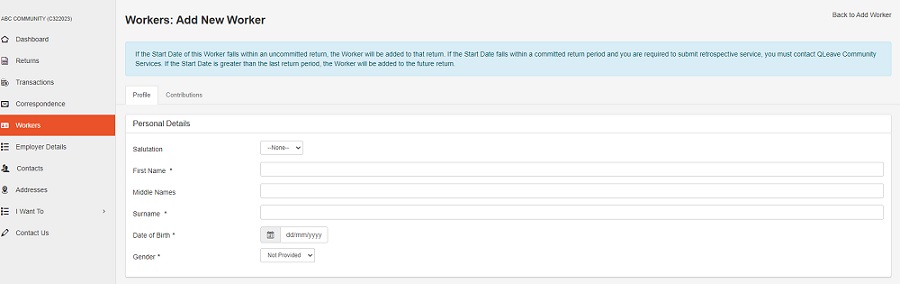
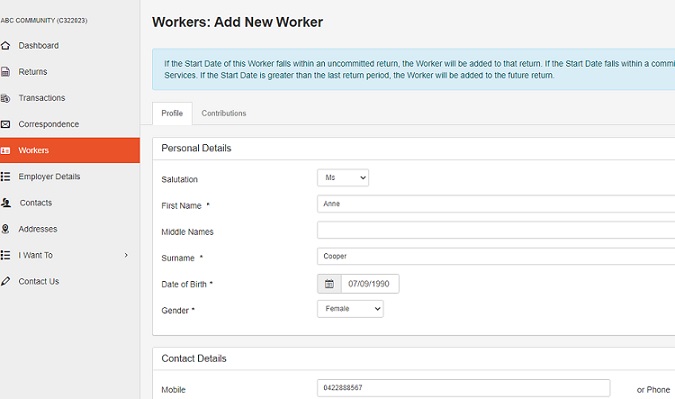
3. Enter the worker's personal details and contact details. If you're adding a worker with an existing QLeave registration, their name and date of birth will be pre-populated. For new workers, you will need to provide these personal details. For all workers, you will need to provide up-to-date contact details including mobile number, email and postal address.
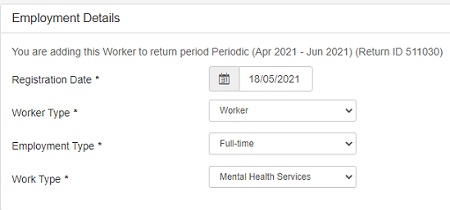
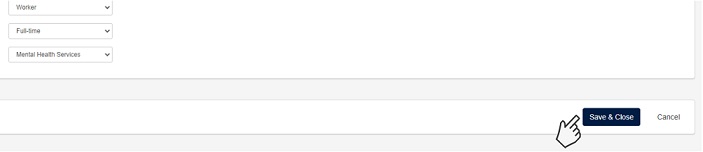
4. Once you've added the worker's personal and contact details, complete their Employment Details.
The earliest registration date you can provide is 1 January 2021, which is the commencement date of the Community Services Industry (Portable Long Service Leave) Act 2020.
For workers that started working for your organisation before the portable long service leave scheme started, you must provide 1 January 2021 as their registration date. For workers that started working with you after 1 January 2021, the registration date is the date they started working for your organisation.
The registration date is not the date of lodging the return, the start date of your organisation, or the current date.
5. Once you've completed the employment details, click Save & Close.
Complete and submit your retrospective return
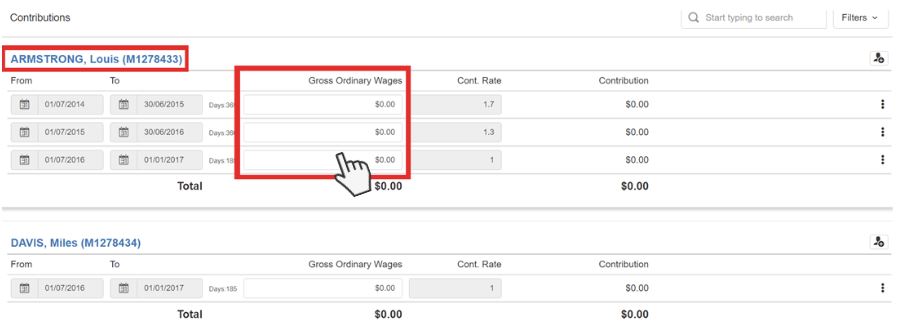
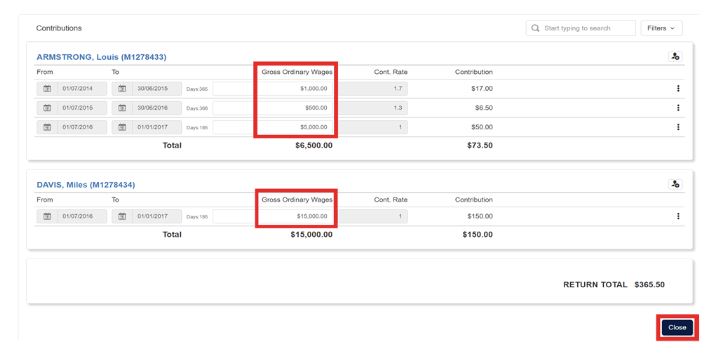
1. Once you have finished adding or terminating workers, you're ready to begin adding data to the return. Make your way through the list of workers and enter the Gross Ordinary Wages for each worker for the current return period.
2. For existing workers on your return, you need to confirm that their work classification and work type didn't change during this period.
To do this, click on the worker's name. This will open a new screen where you can edit the worker's employment details.
Make any changes you need to and then scroll to the bottom of the page and click Save & Close.
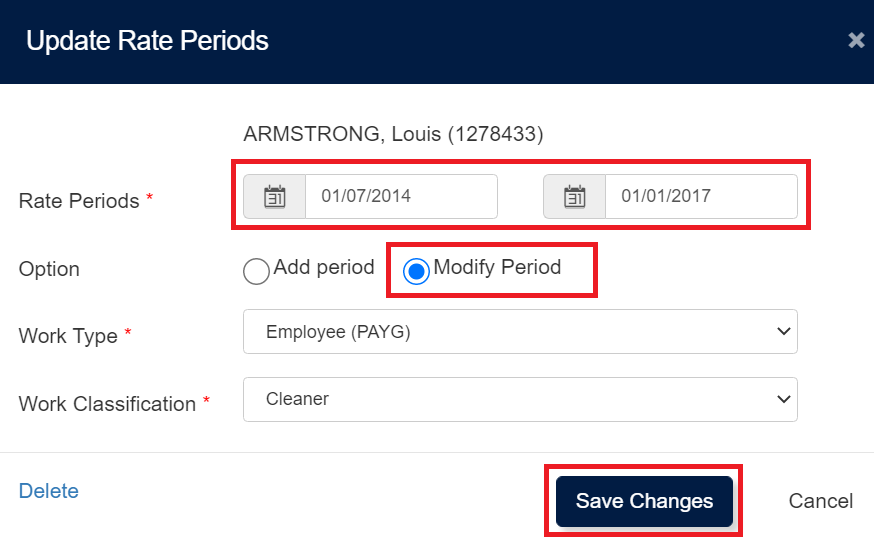
3. To increase or decrease the date range for a worker, click modify.
4. A pop-up window will display allowing you to make adjustments.
Note: This option will allow you to adjust the date range of a worker within the set dates of the return period. You may adjust the date range of a worker by setting the appropriate dates within the Rate Periods boxes, then selecting the Modify Period option, followed by the Save Changes button at the bottom.
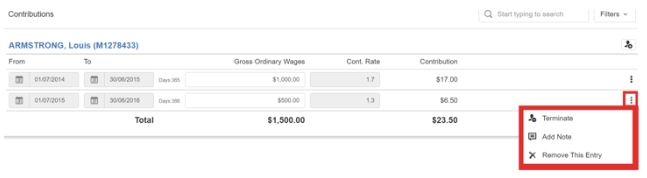
5. If you had workers who ceased working for your company within the return period, they can be terminated by clicking the vertical ellipsis and selecting terminate.
6. Once you've finished entering your workers gross ordinary wages, click close to finish editing your return.
 7. Click Submit Return to finalise your retrospective return.