
Steps to submit your employer return via spreadsheet
You can submit your worker service return to QLeave in two ways. They are:
- entering data directly into the online portal
- bulk importing a spreadsheet into the portal
This guide shows you how to submit your return by importing a spreadsheet into the portal. Click here for instructions to do it by entering data directly into the portal.
Helpful hints before you start
Do not make any changes to the spreadsheet format
- Do not add, remove or rearrange any columns in the spreadsheet.
- Do not add new sheets or tabs to the spreadsheet.
- Do not add additional rows to the spreadsheet (for example, AutoSum of wages).
- If you make changes to the spreadsheet format, you will receive an error message and your spreadsheet will not be accepted when you import it into the portal.
Contributions tab
- The contributions tab is only for existing workers.
- Columns <A-G> in the contributions tab are pre-filled with your worker's details, including their name, QLeave registration number, gender, and date of birth. Do not make any changes to the contents of these columns. If you do, your spreadsheet will not be accepted when you import it into the portal.
- Please make sure you check the work classifications and work types in the spreadsheet for your existing workers and make any changes if needed (for example, you may need to change a worker from 'cleaner' to 'supervisor'.
New workers tab
- The new workers tab is only for new workers. Use this tab to add any new workers who joined your organisation during the quarter.
- Do not add new workers to the bottom of the contributions tab.
Minimum days' work per quarter
- You only need to record service for workers who worked five or more days during the quarter. Any workers who worked less than five days do not need to be included on your return.
Providing a registration date for new workers
- The registration date is not the date of lodging the return, the start date of your business, or the current date.
Log in
1. Click here to go to the Contract Cleaning Industry Employer Portal.
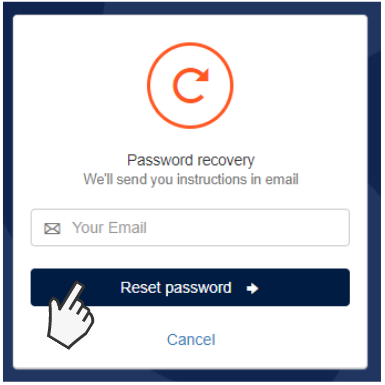
2. When logging in to the new portal for the first time you must reset your password.
Select Forgot password? to receive an email with a password update link. Follow the prompts in the email to reset your password.
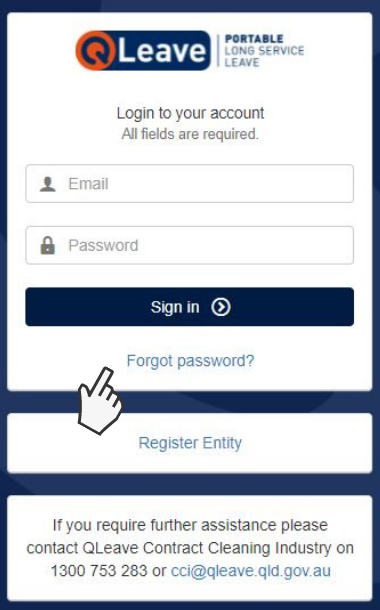
Please note: if you're the primary contact for the organisation, you will receive an email from us when returns become available. If you'd like another contact within your organisation to have access to the portal so they can complete returns, you will need to enable their portal access. Click here for instructions.
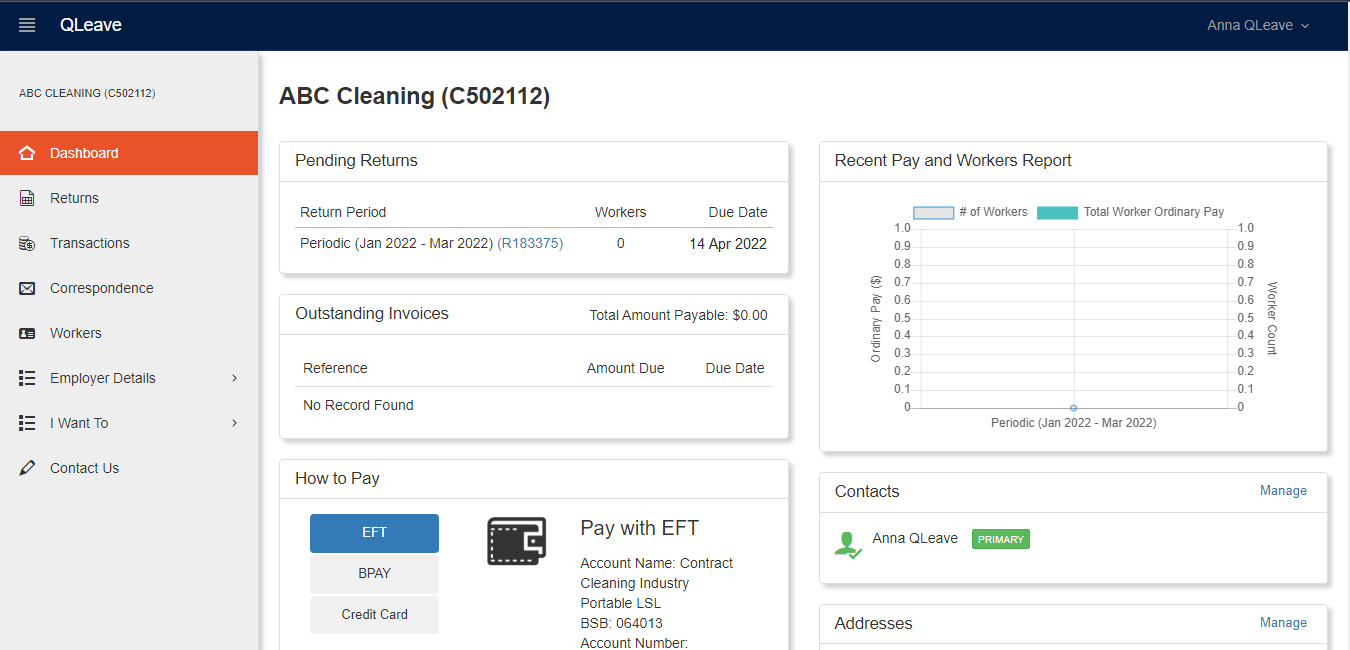
3. Once you’ve logged in to the portal with your new password, you will see your Dashboard on the screen. Your Dashboard tab at the top gives you a snapshot of your account information and tasks including pending returns, outstanding invoices, reports and contact details.
Download your spreadsheet and complete your return
Download the spreadsheet
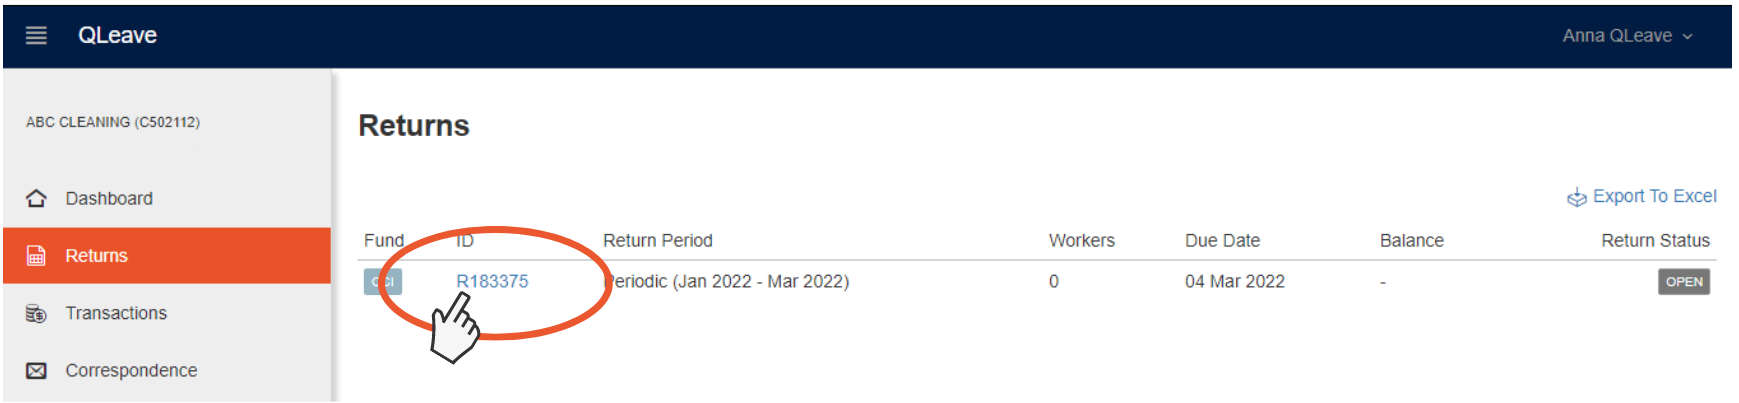
1. Click the Returns tab on the left hand menu.
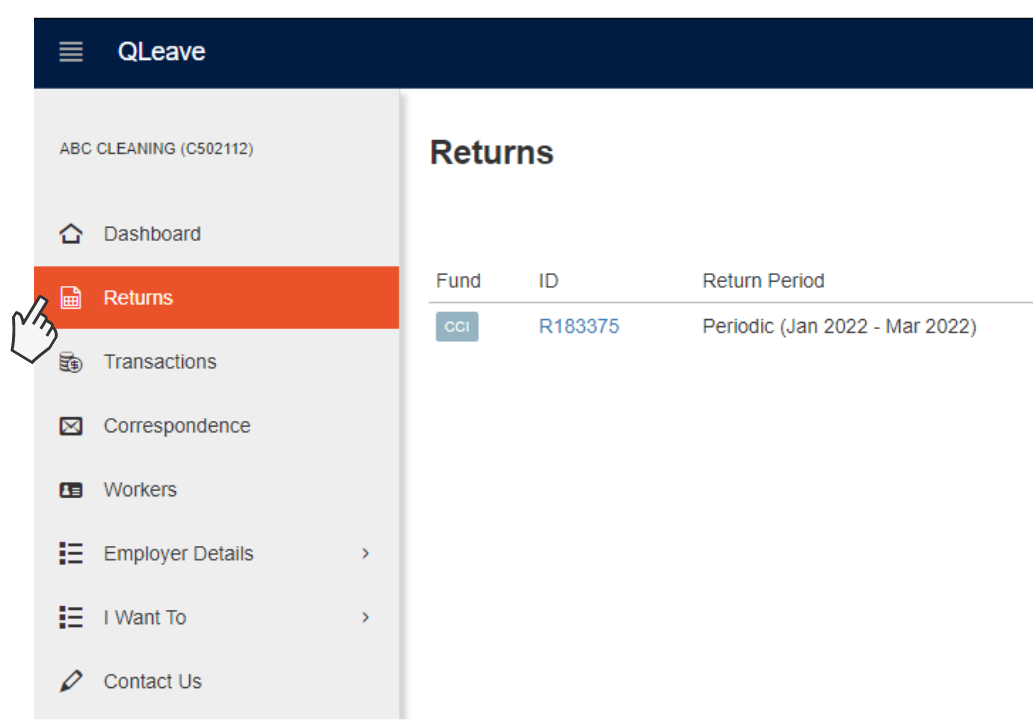
2. Select the blue Return number (e.g. R188375). New returns will have a return status of Open.
3. Click the Export / Import button on the top left of your Return (directly above the periodic return information). This will bring up a screen showing the steps to complete your spreadsheet return.
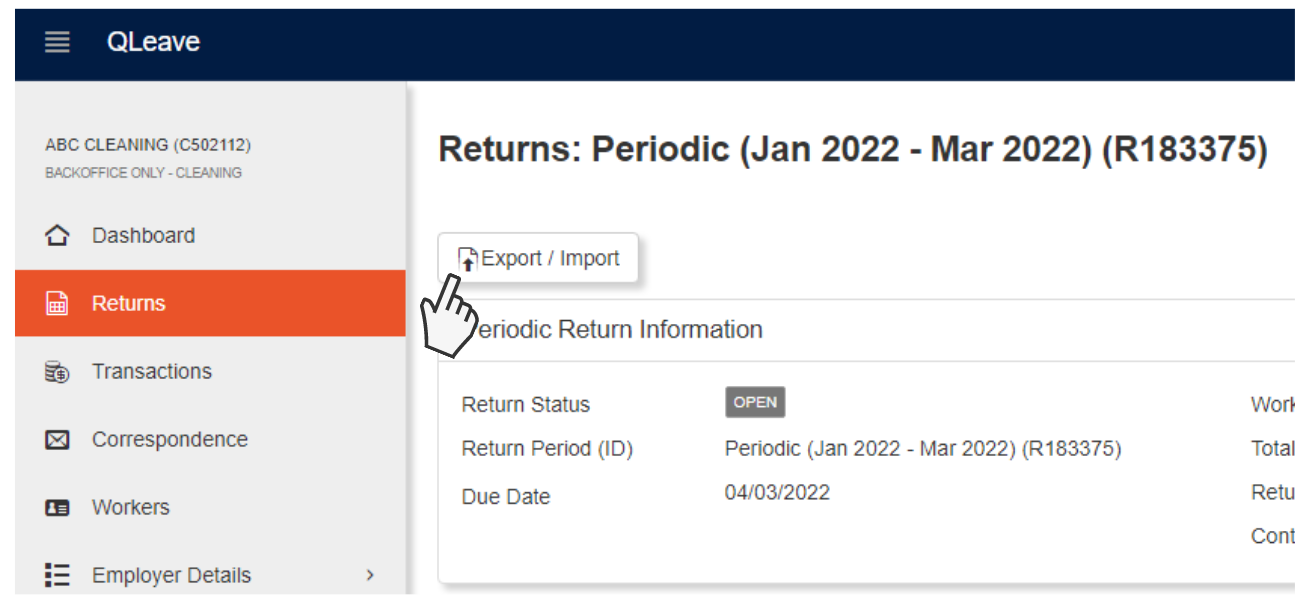
Please note, there's a second Export link further down the page on the right-hand side. Do not click this link. You can use the spreadsheet generated by using this link as a receipt of return but it's not the correct file to download to complete the return. If you use the spreadsheet provided by the second link, you'll receive an error when trying to import it into the portal.
4. Click the Export to Excel button on the right to download your Return as a spreadsheet.
This will download a spreadsheet with a list of all your workers. Save this spreadsheet to your local computer.
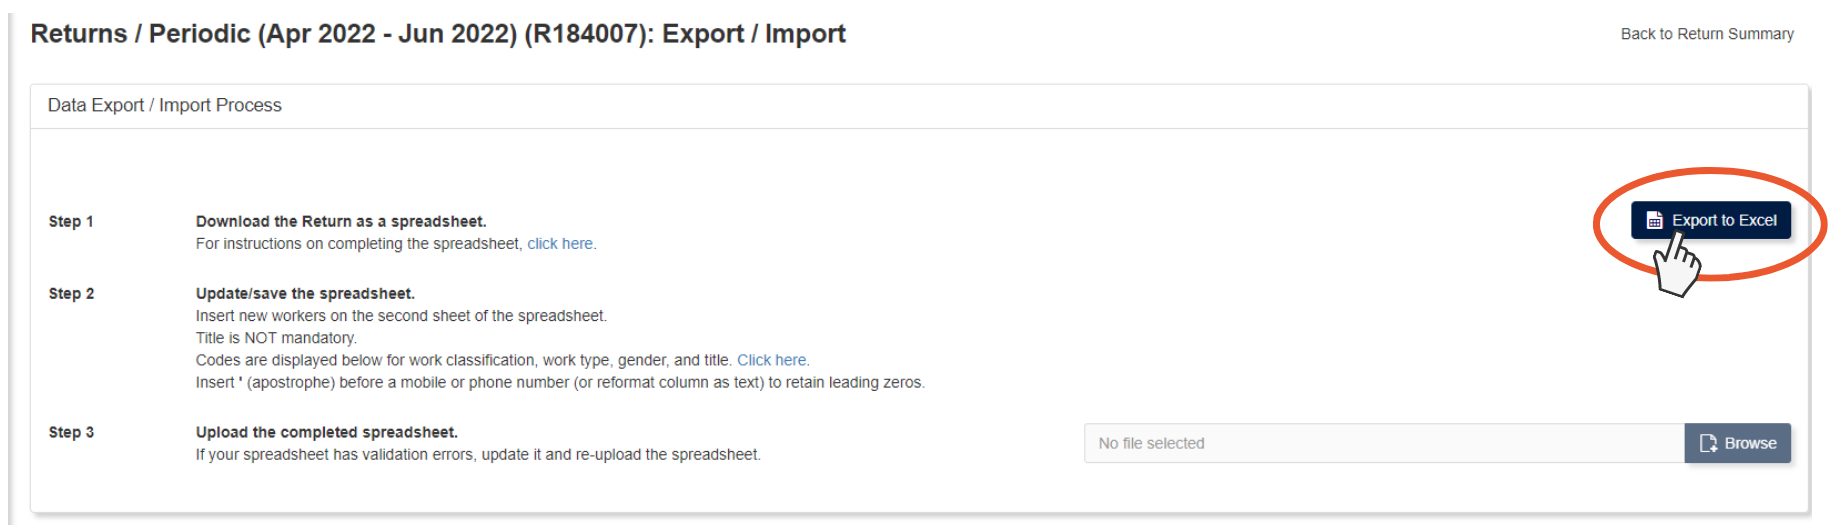
5. Once you've saved the spreadsheet, open the file to start adding details.
Note: please don't make any changes to the format of the spreadsheet (e.g. deleting or changing the order of columns). If you change the format of the spreadsheet, the file may not be accepted when you import it into the portal.
Complete your spreadsheet
There's three sheets in the spreadsheet: contributions, new workers and references. Use the first sheet (Contributions tab) to complete your return, the second sheet is to add new workers. The third sheet has more information and references to help you complete your return.
Columns A - G (DO NOT update these columns)
1. Columns A - G are pre-filled with each of your worker's details, including their Worker ID, Title, Name, Gender and Date of Birth. Do not make any changes to the details in these columns - leave them as is.
Columns H - K (these are the only columns you need to update)
2. Enter the Gross Ordinary Wages (Column H) for each of your workers for the return period. Click here for information on ordinary wages.
Please note: do not enter the total wages for all your workers at the bottom of these columns. If you add the totals, it will cause an error with your spreadsheet.
3. Check the worker's Work Type (column I) and Work Classification (column J) to confirm they haven't changed. If the work type or classification has changed this quarter, please enter the new code in the corresponding column. These codes are available in the References sheet.
4. If you need to terminate a worker who has stopped working for you during the quarter, enter the date worker was terminated in Termination Date (column K). The date entered must be within the return period.

Note: you do not need to enter anything in column L (comment).
Adding new workers to your return
If you have new workers who have started working for you this quarter, you will need to add new worker's details to the second sheet (New Workers tab).
Enter details for your new workers in all columns, including their personal and contact details, start date, work type codes (refer to the codes listed in the References tab of your spreadsheet) and their gross ordinary wages and annual rate of pay for the return period.
Please note, you do not need to include workers who worked less than five days in the quarter on your return.

Submit your spreadsheet
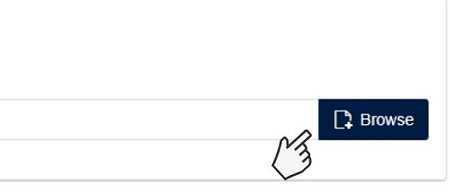
1. Once you've completed your spreadsheet, save it again to your computer. Go back to the portal and click the Browse button to upload your completed spreadsheet.
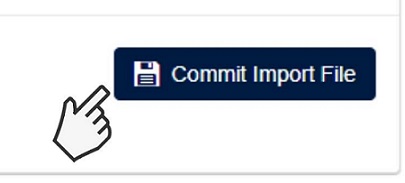
2. Click the Commit Import File button to complete the import and submit your spreadsheet file.
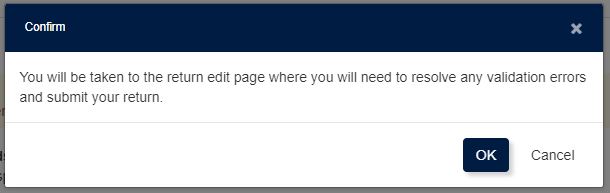
3. Click OK to be taken to return edit page.
The completed data from your spreadsheet will now appear in your Return page on the portal.
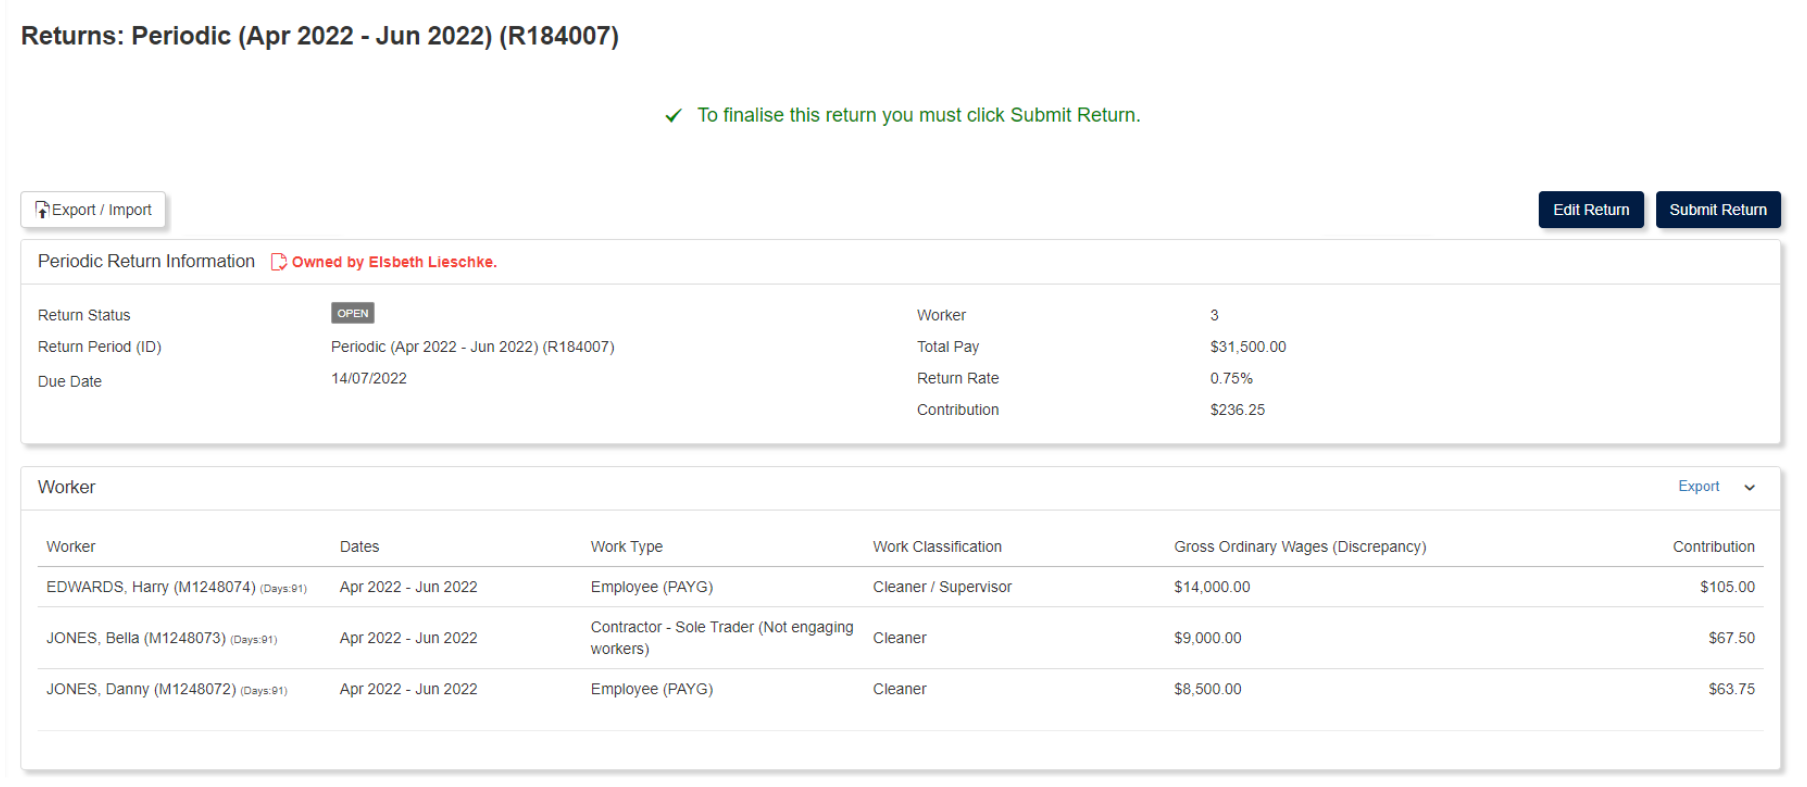
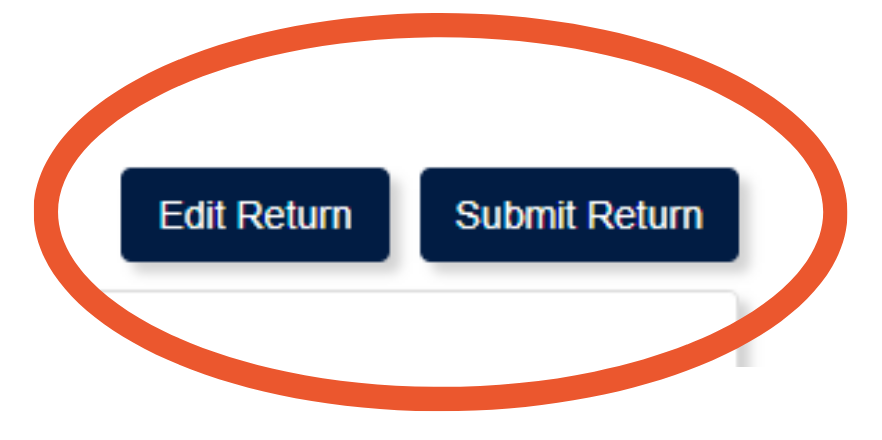
3. Click Edit Return or Submit Return at the top right of your screen.
- If you need to make any changes to your return, click the Edit Return button.
- If you're ready to submit your return, click the Submit Return button to send your completed return to QLeave for processing.
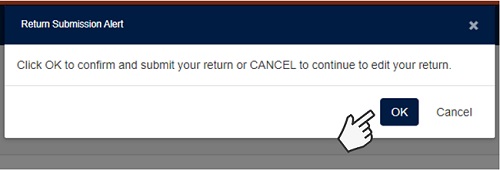
4. When you click Submit Return, a Return Submission Alert will pop up on your screen.
Click OK to confirm and send your return to QLeave. If you need to go back to edit your return, click cancel.
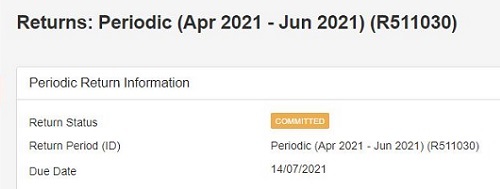
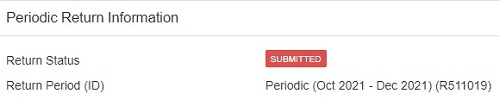
5. Return Status: once your return has been committed the return status will change colour.
- Orange means that your return is committed and ready for payment.
- Red means that your return is submitted and needs to be reviewed by QLeave staff. You may be contacted to help resolve any issues. Once these issues are resolved, the colour of the return status will change to orange to indicate it's now ready for payment.
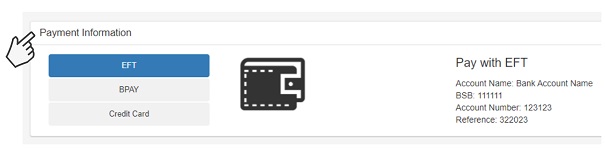
Pay the levy
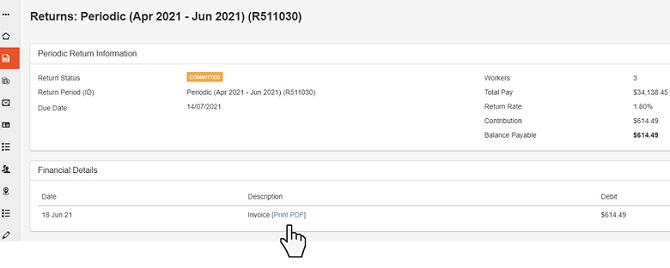
1. Once your Return is in orange committed status, QLeave will email the invoice for the levy payment to your organisation's primary contact.
You can also download your invoice from the dashboard, or by selecting either Returns or Transactions from the left hand menu. Once you've found your invoice, click [Print PDF] to download it.
2. You can pay the levy by EFT, BPay or credit card using the payment details on the invoice or via the Payment Information section in the Returns tab.
Note: for the 1 January to 31 March 2022 quarter, you may receive an error if you're paying your levy via BPay. If this happens, please use the same reference number you used for the October to December 2021 return.
Note: it may take up to 14 days after we've received your payment for the payment status to be updated in the employer portal.