Steps to submit your annual worker service return
Click here to see the steps in an easy to follow video guide.
You can submit your annual worker service return to QLeave in two ways. They are:
- entering data directly into online services
- bulk importing a spreadsheet into online services
This guide shows you how to submit your annual return by entering data directly into online services. Click here for instructions to do it via a spreadsheet.
If you didn’t engage any eligible workers during this financial year, you will need to complete a Nil Return. Click here for instructions.
Helpful hints before you start your return
ONLINE SERVICES WILL TIME OUT AFTER 20 MINUTES OF INACTIVITY
Please note, our online services will time out after 20 minutes if you are not actively using it. If this happens, it will log you out and you will lose any data you’ve entered.
To prevent this from happening, do not leave it inactive for longer than 15 minutes and make sure you keep clicking Save to save your data.
PAGES IN SERVICE RETURN SCREEN
Please note, a maximum of 10 workers are displayed on each page of your service return. Submit the workers on each page before you move to the next page. Otherwise, you could lose your progress. Submit each page by clicking Submit selected workers.
If you have more than 10 workers, your return will include multiple pages. Use the page numbers at the bottom of the screen to click through all pages to ensure you complete the service information for all workers on your list.
SUBMIT A PREVIOUS RETURN
If you need to complete a return for a past financial year, or add service for a worker you missed in a past return (for example, a worker asks you to add service that's missing from their record from two or three years ago), select the relevant year from the list of outstanding returns. Please check both the Outstanding and Complete tab if you can't see the return you need to submit immediately.
Once you open the past return, any workers you didn't submit service for previously will have a status of not submitted, while workers you've already recorded service for will have a status of submitted. You only need to add service for workers who have a status of not submitted.
PARTIAL RETURN SUBMISSION
You are able to do a partial return submission if you have entered service information for some workers but not others. You can save and come back to finish your return later if you want to. If you do this, remember to complete the service information for your remaining workers and submit the return before 31 July.
FULL TIME
Full time is:
- five (5) days per week (between the start and finish dates of the relevant financial year)
- 220 days per year (this number of days will be calculated automatically when you select full time on your worker service return)
- not inclusive of overtime.
PART TIME
Part time is:
- less than five (5) days per week (between the start and finish dates of the relevant financial year)
OR - an eligible subcontractor (to calculate the number of days worked, count the total number of hours worked and divide by 7.6)
CASUAL
To calculate the number of days worked, divide the number of hours worked by 7.6.
TERMINATION END DATE
Termination end date is:
- the date you stopped engaging the worker
OR - the date the worker stopped performing eligible building and construction work in Queensland (if they are still engaged by you, but not performing work that is eligible for QLeave).
Only terminate a worker through the return if they stopped working with you during that financial year. If you need to terminate a worker who finished with you outside that financial year, you'll need to do that through the Workers tab, not on your return.
SUBMITTING A NIL RETURN
If you didn't engage any eligible workers during the financial year, you will need to submit a nil return to QLeave. Click here to find out how to submit a nil return.
REPORTING PARTIAL DAYS
Please note, you must report only full days of work. If they've done part days, you need to round down.
- 145.2 days rounds down to 145 days of work.
- 90.55 days rounds down to 90 days of work.
Login and start your return
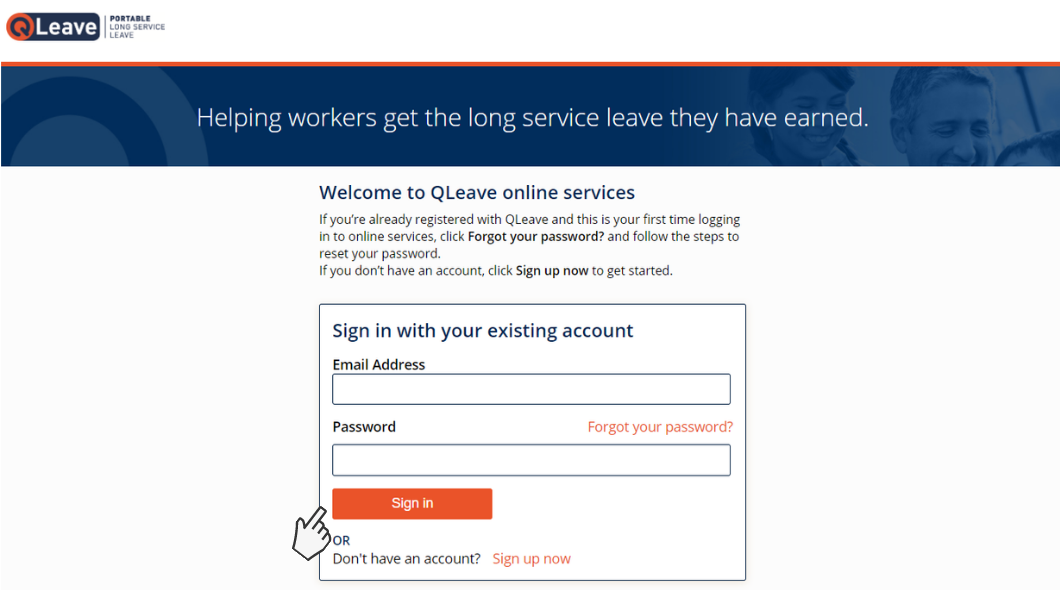
1. Go to QLeave online services.
2. Enter your email address and password and click Sign in. If you don’t know your password, click Forgot your password? to reset it. A verification code will be emailed to you. Click here for help resetting your password.

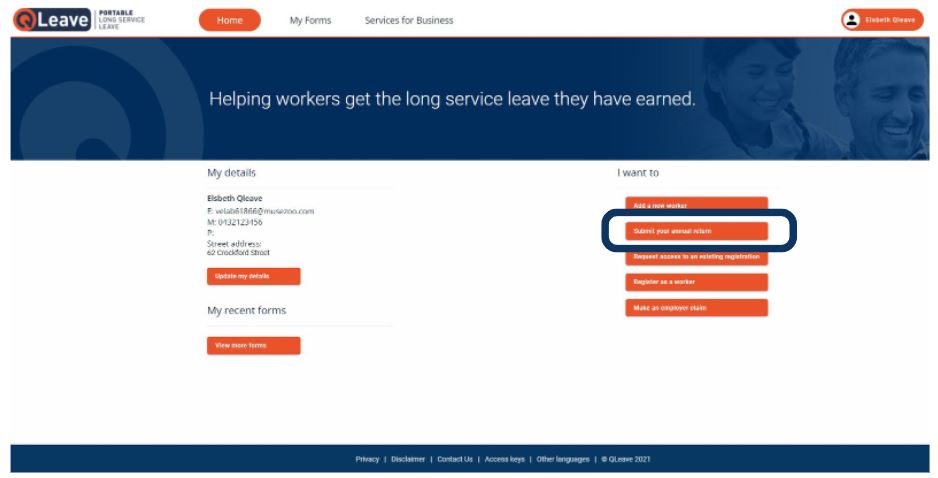
3. Once you've logged in, you'll be taken to the online services home page. If you need to add new workers, you need to do this before starting your return. To do this, select add a new worker from the I want to menu on the right-hand side.
For help starting a new worker, please click here to read the instructions.
Please note: if you've added new workers, we may need to assess their eligibility before you can add service for them. When you open your return, these workers will have a pending status, which will prevent you submitting your return. We'll contact you once we've confirmed their eligibility so you can submit your return.
4. If you don't need to add new workers and want to go directly into your return, select Submit your annual return from the I want to menu on the right-hand side.
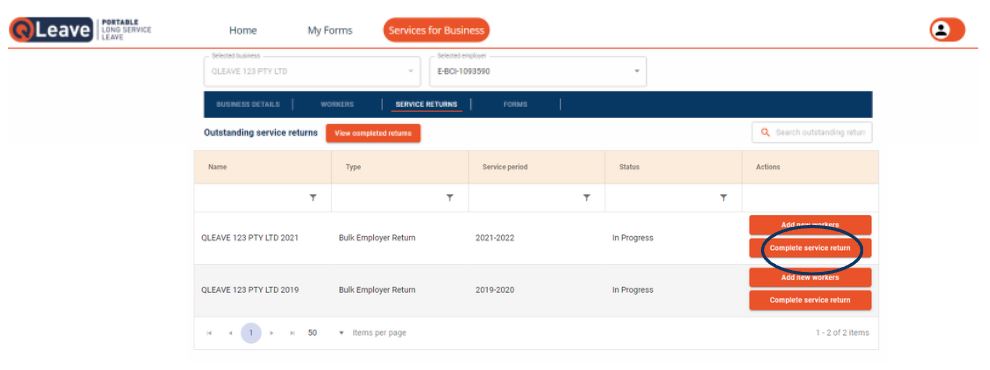
5. Once you're in the service returns tab, make sure that you have the correct business selected. In the Outstanding service returns tab, you'll see a list of your outstanding returns, by financial year. You can also view your completed returns by clicking the View completed returns button.
6. To start your return, click the Start service return button for the return you wish to do.
- If you're completing your annual return, select the most recent financial year's return and add service for all of your workers, and terminate workers who finished with you during the year.
- If you're completing a previous return, select that return from the list.
Complete your service return
1. A list of all your workers will appear on the Service Returns screen.
The top section displays your selected business and the service return period.
The bottom section displays your worker's details, including their registration ID and name. These details are pre-filled based on the information you provided when they started. When you first start the return, all your workers will have a Status of ‘Not Submitted’.
For each worker, move across each column from left to right to update the required information.
Submit the workers on each page before you move to the next page. Otherwise, you could lose your progress. Submit each page by clicking Submit selected workers.
2. Check the information in the Work Type and Work Classification columns is correct. If the worker’s work type or classification has changed, you can click into the field and select the correct option from the dropdown list to update it. If their work type or classification has not changed, you don't need to do anything and can continue moving across the table.
The Start Date for each worker is pre-filled based on the information you provided when you started that worker, so this column can’t be changed.
3. In the next column (full time), click the orange checkbox to tell us that the worker was employed on a full time basis during the year.
If they were full time, we'll automatically calculate their service at 220 days for the financial year (which is the most a worker can record).
4. If the worker was employed on a part time or casual basis, leave the orange checkbox unticked and enter the number of days they worked in the Days Worked column.
5. If the worker finished working with you during the financial year, click the orange checkbox in the Terminated column and enter their last day worked in the End Date column.

7. If the worker is still employed with you but didn't work during the financial year, select the orange checkbox in the last column (No eligible work performed). This will keep the worker on your records without adding service for them.
Once you have entered information in the data fields for your workers, click Save.
Please note, a maximum of 10 workers are displayed on each page of the return. If you have more than 10 workers, you will need to click through each page to complete the information for all workers on your list. Save each page before you go to the next page to avoid losing your progress.
8. If there are any errors on your return, you’ll receive the below message.
Look through the table to find the fields highlighted in red, fix these errors and click Save again.
Please note: if you have recently added any new workers, we may need to assess their eligibility. When you open your return, workers who have not been assessed will have a pending status, and you won't be able to submit your return. We'll contact you once we've confirmed their eligibility so you can submit your return.
Submit your return
1. Once you’ve completed information for all of your workers, you're ready to submit your service return. Click the top left checkbox (next to Worker Registration Id) to select all workers.
2. The save button will now change to Submit.
3. Click Submit all workers. Please only click the submit button once. If you double-click this button, it may result in duplicate records being submitted.
4. Complete the declaration and click Continue to submit your return to QLeave.
Your return will now appear in the Complete tab under service returns. This means QLeave has received your return. If we have any questions, we'll contact you.
If your annual returns are up-to-date, you can also update service for your workers in the current financial year online. Click here for instructions.


